Trim # 2 for Sassy Aug 23, 2013
So, Sassy's feet where getting a bit over 1/4 inch above the sole. So I gave them a bit of a trim. There was not much bevel on most of her feet.
So here they are! Left front before and after front view. The ground is not very even at the trailer.


I went conservative again. I was very careful to not trim off to much height above the sole. but I was more aggressive with my bevel, at least I thought I was!
Below is left front side view before and after.


And the good stuff! The sole views of the left front foot. Before and after the trim.


I just lowered the heels to be even to 1/4 inch above the sole and did my bevel. I think I could have taken more off on that right quarter side. Sassy was being a pain holding this foot up for me. I am still slow using the rasp, but I felt more comfortable with it this time.


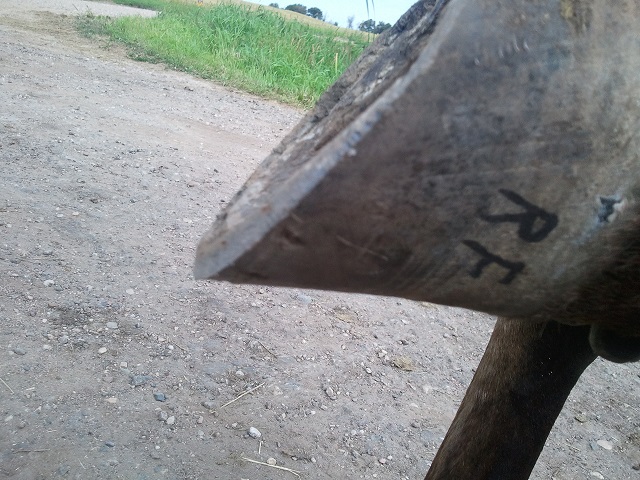
Right Front hoof next. Before and after front views. I had my husband check my bevels and he said this was my worst one. He said it was not steep enough. This was the last hoof I did. I must have been slacking by then.


Side views next, right front hoof. So looking at these pictures of the side views. The other day I talked with a gal that does barefoot trimming. I told her I was just learning on Sassy. I asked her to check my work. She looked at Sassy's hooves and said my bevel could be better but it was not bad. She also said she likes to see the cornet band in a nice straight angled line from the back to the front. She said that when it is not straight from the side. It is pressure points where the quarters are to long on the horse and it is pushing up the cornet band around the hoof unevenly. When you look at these Pictures of the right front hoof you can kinda tell what she is talking about. There is nothing in The HGM about pressure points from the hoof wall hitting the ground unevenly affecting the band. I will have to do more research about it.


Ok now the sole views of the right front hoof.

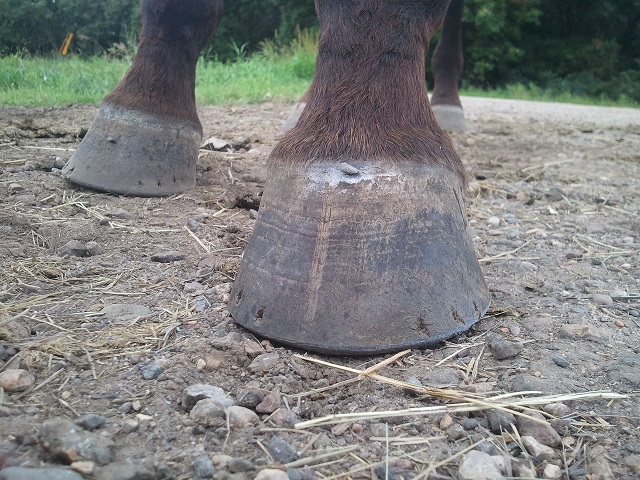
Ok so I wanted to show how deep this yuck is! she has a bit of a flap on this frog. I can stick the hoof pick in there really far. You can see in the trimmed photo that I trimmed some of the flap off to try to get it open to the air so it can dry out.


Here is my weak bevel. I am going to say its hard to do with my dumb left hand!

The left Hind hoof photos. Sorry about the grass I was by my self and had to tie her to the trailer.


Side views of the left hind hoof. Before and after views.

It just amazes me how the hoof can change with just a bit of a trim. Something that we see as hard and unmovable, can change with just a few rasps. Look at how much this heel changed. this is her deformed hoof also.

Now the sole views of the left hind hoof. Before and after.


Not much to trim on this one. I just got my bevel on, lowered the high heel side and took off some flappy frog with my hand. I know she has had a bar on that right side. I guess something is working out there. I am sure it will right itself.
Here are some side shots of the same hoof.


Right hind front views. Not much to say with this one just trimmed her up.


Side views of the right hind.


Now the sole photos for the right hind.


Also just a note I took her to a working cow horse show on Saturday the 24th. The day after this trim. We won the trail class and the confirmation class and got 1st place all around. Ya we blew the reining cow horse class but not because she was sore. She was ready for barrels instead of a reining pattern, It was our first time doing one! Oh and we did not get our steer penned. We had a ton of fun! She never took a bad step.
Sorry no video this time could not get it to load.
So I thought I would post some pictures of her feet. I want to see how they have changed from when we started. These are all before any trimming has been done.
Right front hoof.
 Aug 2-2013 just after shoes removed.
 Aug 10-2013. One week after shoes removed.
  Aug 23-2013.Three weeks after shoes removed.
Left front hoof.
 Aug 2-2013. Just after shoes removed.
  Aug 10-2013. One week after shoes removed.
 Aug 23-2013. Three weeks after removed.
Now the right hind.
 Aug 2 just after shoes removed.
  Aug 10. One week after shoes removed.
  Aug 23, three weeks after shoes removed.
Left hind next.
 Aug 2,2013
 Aug 10,2013
 Aug 23, 2013.
Wow quite a big change is these pictures. I think she is looking better, not great but better.


